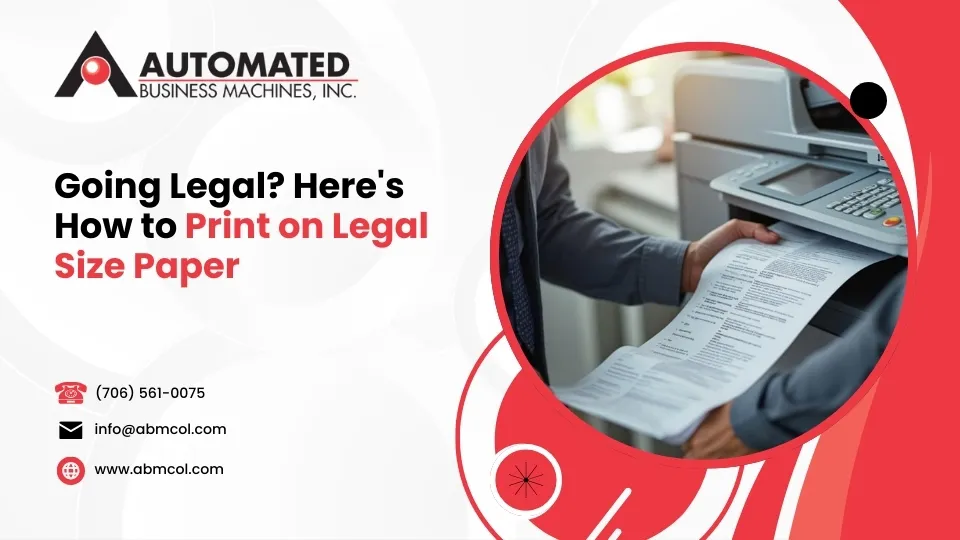
Printing on legal size paper can seem tricky, especially when dealing with important contracts or official documents. You know these longer formats need special handling, but how do you ensure they print correctly without frustration or wasted paper?
The good news is, it’s simpler than you might think. Here’s the quick rundown:
- Load Legal Paper: Place 8.5″ x 14″ legal size paper into your printer’s adjustable tray.
- Open Document: Open your file in your chosen software, like Microsoft Word or a PDF viewer.
- Access Print Settings: Go to the “File” menu and select “Print.”
- Select Paper Size: In the printer properties or preferences, choose “Legal” (8.5 x 14 inches) from the paper size options.
- Print: Confirm all settings and click “Print.”
While most everyday tasks use standard 8.5″ x 11″ letter paper, critical documents in legal, real estate, and accounting fields require the extra length of legal paper. This guide will walk you through everything you need to know, from dimensions and uses to printer setup and step-by-step instructions, so you can handle all your legal size printing needs with confidence.
, Letter (8.5x11 inches), and A4 (8.27x11.69 inches) paper sizes, highlighting their distinct lengths and common geographic usage, with Legal being the longest and primarily used in North America. - Legal size paper printing infographic 4_facts_emoji_light-gradient")
Before diving into legal size paper printing, it’s helpful to understand the format. Legal paper, sometimes called “foolscap” due to a historical watermark, has a long legacy in official documents. It is a standard in North America (United States, Canada, and parts of Mexico), which uses a different system than the ISO 216 standard (A4, A3, etc.) used in most other parts of the world. For a deeper dive, see our Legal Paper Size Guide.
What Are the Dimensions of Legal Size Paper?
Knowing the exact dimensions of legal size paper is crucial for setting up your documents and printers correctly.
- Inches: Legal size paper measures 8.5 inches by 14 inches (8.5″ x 14″). This is its most common dimension in the US and Canada.
- Millimeters: In metric terms, legal size paper is 216 mm by 356 mm (216 x 356 mm). This is useful when dealing with international specifications or printers that default to metric units. For more details, see our Legal Size Paper Dimensions in MM: Essential Guide.
Pixel dimensions vary by resolution (DPI/PPI). At a standard 300 DPI for high-quality printing, legal paper is approximately 2551 x 4205 pixels. This distinct size gives legal documents their characteristic look. You can learn more on our Legal Size Paper page.
Legal vs. Letter vs. A4: Key Differences
Understanding the difference between Legal, Letter, and A4 paper is key, as you’ll often encounter documents from different regions. Here’s a breakdown:
| Feature | Legal Paper | Letter Paper | A4 Paper |
|---|---|---|---|
| Dimensions | 8.5″ x 14″ (216 x 356 mm) | 8.5″ x 11″ (216 x 279 mm) | 8.27″ x 11.69″ (210 x 297 mm) |
| Aspect Ratio | 1:1.65 | 1:1.29 | 1:1.414 (approx. 1:sqrt(2)) |
| Primary Uses | Contracts, legal documents, accounting | Everyday documents, reports, academic | General office, international documents |
| Geographic | USA, Canada, parts of Mexico | USA, Canada, parts of Mexico | Most of the world (Europe, Asia, etc.) |
| Commonality | Specific professional use | Most common in North America | Most common globally |
Legal paper is noticeably longer than both Letter and A4. This difference often requires scaling when printing international documents on North American printers, or vice-versa (e.g., scaling an A4 document to 94% to fit on Letter paper). This distinction is crucial for effective legal size paper printing. For more details, see our articles on Legal Size Paper vs. Letter: Key Differences and Legal Size vs. Long Bond Paper: What’s the Difference?.
Common Uses and Advantages
Legal size paper’s extended length offers distinct advantages for specific applications:
- Contracts and Legal Documents: Provides ample space for detailed clauses, signatures, and amendments in contracts, deeds, wills, and court pleadings, reducing the need for multiple pages.
- Real Estate Deals: Accommodates extensive documentation for property deeds and lengthy agreements.
- Accounting Ledgers and Financial Reports: The longer format allows for more columns and detailed financial breakdowns on a single sheet.
- Government Forms: Many standardized government forms are designed for legal size paper to ensure uniformity.
- Business Contracts: Used for internal and external agreements and proposals to present comprehensive information clearly.
The primary advantage is fitting more content per page, which creates clearer documents and reduces page count. It also lends a professional appearance essential for documents with legal weight. Understanding these uses is key to adhering to Legal Document Printing Rules and ensuring your documents are fit for purpose.
Preparing Your Printer and Document for Legal Size Paper Printing
With your legal paper ready, the next step is preparing your printer and digital document. Proper setup is the key to a smooth printing process, ensuring everything from paper loading to software settings is correctly configured.

Can Your Printer Handle Legal Size Paper?
Most modern inkjet and laser printers, especially multifunction models, can handle legal size paper. Here’s how to check and prepare your printer:
- Check Printer Specifications: Consult your printer’s manual or look up its specs online. Look for “supported paper sizes” and confirm it lists “Legal” or “8.5” x 14″.
- Inspect Paper Trays: Examine your printer’s paper trays. Most have movable guides that extend to fit different paper lengths, often with markings for “Letter” and “Legal.”
- Use the Bypass Tray: If the main tray is too small, check for a bypass tray (a fold-out tray on the front or back). These are designed for specialty papers and non-standard sizes.
- Load Paper Correctly: Load your legal size paper, ensuring it’s snug against the guides but not bent. Don’t overfill the tray, and load it face up or face down according to your printer’s instructions to prevent jams.
For businesses and law firms, reliable legal size printing is non-negotiable. Our Legal Office Printers: Top Picks for Law Firms guide can help if you’re looking to upgrade.
Essential Printer Settings for Legal Size Paper Printing
Even if your printer can handle legal paper, you need to configure the settings. This step is crucial for successful legal size paper printing.
Here’s how to configure your printer settings:
- Access Print Dialog: Go to “File” > “Print” (or press Ctrl+P on Windows, Command+P on Mac).
- Select Your Printer: Ensure the correct printer is selected.
- Open Printer Properties: Click the “Printer Properties,” “Preferences,” or “Print Settings” button.
- Select ‘Legal’ Paper Size: In the properties window, steer to the “Paper/Quality” or “Media” tab and select “Legal (8.5 x 14 in)” from the paper size menu.
- Choose Paper Source: If you have multiple trays, specify which one contains the legal paper (e.g., “Tray 2,” “Bypass Tray”).
- Set Orientation: Ensure the orientation (usually “Portrait” for legal documents) is correct.
- Confirm Settings: Click “OK” or “Apply” to save your changes.

Troubleshooting Missing ‘Legal’ Option: If “Legal” is missing from your settings:
- Update Printer Drivers: Visit your printer manufacturer’s website and download the latest drivers for your model.
- Define Custom Paper Size: Some drivers let you create a “Custom Size.” Enter 8.5 inches for width and 14 inches for height.
- Check Compatibility: In rare cases, very old or basic printers may not support legal size, indicating it might be time for an upgrade.
Formatting Your Document in Common Software
You must also format your document to legal size within your software. This prevents awkward page breaks and ensures a professional look for your legal size paper printing.
- Microsoft Word (Windows & Mac):
- Go to the “Layout” tab.
- Click “Size” in the “Page Setup” group.
- Select “Legal (8.5″ x 14″)” from the menu.
- Google Docs:
- Go to “File” > “Page setup.”
- In the “Paper size” dropdown, select “Legal.”
- Click “OK.”
- Adobe Acrobat/Reader (for PDFs):
- In the Print dialog, find “Page Sizing & Handling.”
- Select “Actual Size” if the PDF is already formatted for legal size.
- Check the “Choose paper source by PDF page size” option if available. This tells the printer to automatically select the tray with legal paper.
‘Fit to Page’ vs. ‘Actual Size’: Use “Actual Size” if your document is already designed for legal paper to print at its intended dimensions. “Fit to Page” resizes content to fill the paper, which is useful for printing smaller documents onto legal paper but can distort content if not used carefully. For professional results, always aim to use “Actual Size” with a correctly formatted document. This prepares your file to Print Legal Size Documents Fast.
Step-by-Step Guide: How to Print Legal Size Documents
With your printer and document prepared, you’re ready to print. The process is similar across devices, but there are minor differences for Windows, Mac, and PDFs. Before printing, double-check your paper tray and settings to ensure accuracy. Let’s walk through each scenario.

Printing from a Windows PC
Here’s how to print legal size documents from a Windows PC to ensure your legal size paper printing is successful:
- Open Your Document: Open the file in its native application (e.g., Microsoft Word).
- Access Print Function: Go to “File” > “Print” or press
Ctrl + P. - Select Your Printer: Choose the correct printer from the dropdown list.
- Open Printer Properties: Click the button labeled “Printer Properties,” “Preferences,” or “Printing Preferences.”
- Set Paper Size to ‘Legal’: In the new window, find the “Paper/Quality” or “Media” tab. From the “Paper Size” dropdown, select “Legal” (8.5 x 14 in).
- Select Paper Source: If needed, specify the tray where you loaded the legal paper (e.g., “Tray 2,” “Bypass Tray”).
- Confirm Settings: Check other settings like orientation (“Portrait”), color, or duplex printing.
- Print: Click “OK” or “Apply” to save the printer settings, then click “Print” in the main dialog box.
Printing from a Mac
The process for legal size paper printing on a Mac is also straightforward. Here are the steps:
- Open Your Document: Open the file in your application (e.g., Pages, TextEdit).
- Access Print Function: Go to “File” > “Print…” or press
Command + P. - Show Details: If you see a simplified view, click the “Show Details” button to reveal all settings.
- Select Paper Size: Find the “Paper Size” dropdown menu and choose “US Legal” (8.5 x 14 in). You may need to click “Page Setup…” first to access this option.
- Review Paper Handling: In the dropdown menu that defaults to “Copies & Pages,” you can select “Paper Handling” to confirm settings like “Scale to fit paper size.” For best results, ensure it’s set to print at “Actual Size.”
- Confirm Settings: Double-check orientation, color, and copy count.
- Print: Click the “Print” button.
Printing a PDF in Legal Size
Printing PDFs on legal paper requires specific attention to the print settings in your PDF viewer, like Adobe Acrobat Reader.
- Open Your PDF: Open the PDF file in your viewer.
- Access Print Dialog: Go to “File” > “Print” or press
Ctrl/Command + P. - Select Your Printer: Choose the correct printer.
- Set Page Sizing: In the “Page Sizing & Handling” section, select “Actual Size” if your PDF is already formatted for legal size.
- Choose Paper Source by PDF Size: If available, check the box for “Choose paper source by PDF page size.” This feature intelligently tells the printer to pull from the tray configured for legal paper, streamlining the process.
- Open Printer Properties: Click “Properties” or “Preferences” to open the printer driver settings. Confirm that the paper size is set to “Legal (8.5 x 14 in)” and the correct tray is selected.
- Print: After confirming settings in both the PDF viewer and the printer driver, click “Print.” This two-step confirmation is paramount for accurate Legal Document Printing.
Frequently Asked Questions about Legal Size Paper Printing
Even with the right steps, questions can arise during a print job. Here are answers to the most common questions about legal size paper printing.
Why is there no ‘Legal’ size option in my printer settings?
If the ‘Legal’ size option is missing from your printer settings, it’s usually due to one of a few common issues:
- Outdated Printer Drivers: Drivers act as a translator between your computer and printer. If they are old or corrupt, they may not report all of your printer’s capabilities. The fix is to visit your printer manufacturer’s website, find your model, and download the latest drivers.
- Printer Incompatibility: Older or very basic models may not support legal size paper. Check your printer’s manual or online specifications to confirm its supported sizes.
- Incorrect Printer Installation: Your computer may have installed a generic driver instead of the specific one for your model. Reinstalling the printer with the manufacturer’s software can resolve this.
- Use a Custom Size: As a workaround, look for a “Custom Size” option in your printer properties and manually enter the dimensions 8.5 x 14 inches.
Can I print a legal size document on letter paper?
Yes, you can print a legal size document on letter paper by using your printer’s “Fit to Page” or “Scale to Fit” setting. However, be aware that this will shrink the content to fit the shorter paper.
While this works for a quick reference copy, it is not recommended for official documents, contracts, or forms. The scaled-down text may become difficult to read, and the result can look unprofessional or even affect the document’s validity. If you must do this, select “Fit” in your print dialog, but for anything official, it’s best to use the correct paper size. Learn more in our guide on how to Print Legal Size Document on Letter Paper.
What are the best envelopes for legal size documents?
Choosing the right envelope depends on whether you plan to fold the document. Your choice reflects your attention to detail and professionalism.
- For Folded Documents: The most common method is to tri-fold the document. A legal size sheet folded twice fits perfectly into a standard #10 business envelope (4.125″ x 9.5″). This is ideal for mailing contracts and formal letters.
- For Unfolded Documents: To keep a document flat and free of creases, use a larger catalog envelope. A 9″ x 15″ or 10″ x 15″ envelope is perfect, allowing the document to slide in without being folded.
- For a Single Fold: A 9″ x 12″ clasp envelope is another option, requiring just one gentle fold across the document’s width.
For a complete breakdown of options, see our article on Legal Size Envelope Dimensions and Types Explained.
Conclusion
Phew! You’ve made it. By now, you should feel like a true pro when it comes to legal size paper printing. It really doesn’t have to be a tricky task, does it? We’ve covered everything from its unique dimensions to ensuring your printer and software are on the same page.
Remember those key takeaways? It all boils down to a few simple, but important, steps:
- Always check the unique dimensions of legal paper.
- Verify your printer’s compatibility and make sure it’s loaded just right.
- And finally, carefully adjust both your document software and printer settings before you hit print.
Following these steps ensures that every critical contract, detailed report, or important form comes out looking crisp, professional, and exactly as it should. The extra length of legal paper isn’t just a random detail; it’s a smart design choice that lets you pack more important information onto a single page. This is super helpful for legal, financial, and business documents where clarity and completeness are key. Mastering this type of printing means your documents will always make the best impression.
If your business, whether you’re in Albany, Athens, Atlanta, Augusta, Columbus, Johns Creek, LaGrange, Macon, Marietta, Newnan, Roswell, Sandy Springs, Savannah, or even Auburn, GA, needs reliable printing solutions that handle all document sizes – from the everyday to the extra-long – we’re here to lend a hand. At Automated Business Machines, we specialize in providing customized, advanced multifunction printers and managed print services. We’re all about helping you boost productivity and make your workflow smoother. Plus, as a locally owned and operated team, we’re committed to offering secure printing and digital workflow solutions custom precisely to your unique needs.
Ready to dive even deeper into paper? Explore our comprehensive guide to paper dimensions for more information and find how we can support all your printing requirements, big or small!