Learning how to print on photo paper transforms your digital photos into lasting, professional-quality prints that preserve precious memories for years to come. Here’s the quick answer:
Essential Steps for Photo Paper Printing:
- Prepare – Edit your photo to 300 PPI resolution and choose the right paper type
- Load – Place photo paper in the correct tray with the glossy side facing the right direction
- Configure – Set printer to “Photo Paper” mode and select “Best” or “High” quality
- Print – Start the job and let photos dry face-up for 15 minutes after printing
Photo printing at home has become incredibly accessible, yet many people struggle with getting professional-looking results. The difference between a mediocre print and a stunning one often comes down to understanding your paper, optimizing your printer settings, and handling the final prints properly.
Whether you’re an office manager looking to create impressive presentations or someone wanting to bring digital memories to life, mastering photo paper printing opens up endless possibilities. From vibrant family portraits on glossy paper to neat business materials on matte finishes, the right technique makes all the difference.
The key lies in understanding that photo paper isn’t just fancy regular paper – it requires specific handling, precise settings, and careful post-print care to achieve those lab-quality results you’re after.
, Stage 2 - Load (demonstrating proper paper placement in printer tray), Stage 3 - Print (illustrating printer settings and quality options), and Stage 4 - Preserve (showing proper drying and storage techniques) - how to print on photo paper infographic")
Pre-Print Prep: Choosing Your Paper and Perfecting Your Photo
Think of how to print on photo paper like preparing a gourmet meal – the magic happens long before you start cooking. Your paper choice and photo preparation are the secret ingredients that separate stunning prints from disappointing ones.
The truth is, even the fanciest printer can’t rescue a poorly prepped photo or wrong paper choice. But get these fundamentals right, and you’ll be amazed at the professional results you can achieve at home.

Understanding Photo Paper Types
Walking down the photo paper aisle can feel overwhelming with all those different finishes and weights. But once you understand what each type brings to the table, choosing becomes much simpler.
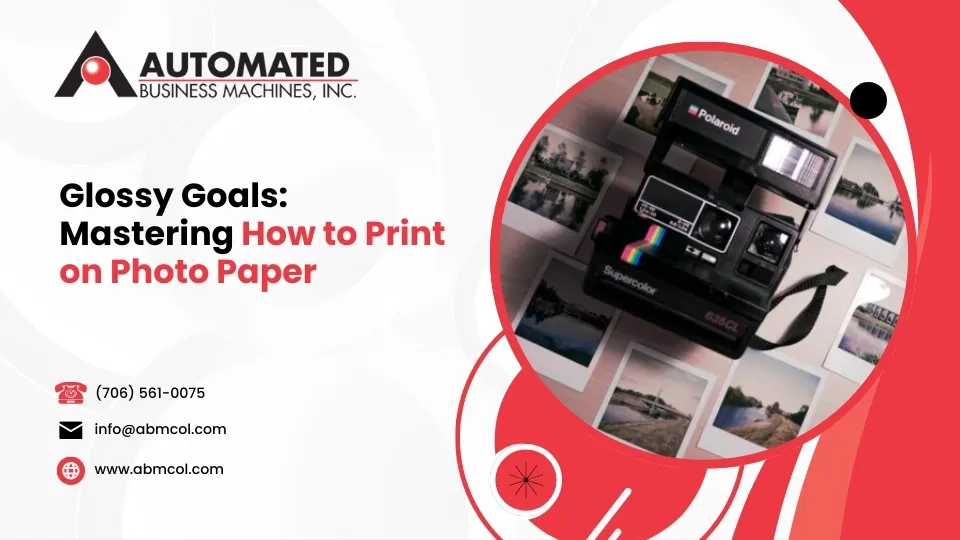
Glossy paper is the showstopper of the photo paper world. Its smooth, highly reflective surface makes colors pop with incredible vibrancy and sharpness. When you want your vacation photos to have that “wow factor” or need portraits where every detail matters, glossy delivers. The special coating grabs onto inkjet inks beautifully, creating those rich, saturated colors we all love.
The downside? That same reflective quality can create glare, and glossy paper loves to show fingerprints. For a deeper dive into maximizing glossy paper results, check out our High Glass Photo Paper Guide: Types, Uses, Tips.
Matte paper takes the opposite approach with its soft, non-reflective finish. This creates a more artistic, subdued look that’s perfect for black and white photography or when you want that classic, timeless feel. Matte hides fingerprints better and eliminates glare completely, making it ideal for photos that will be handled frequently or displayed where lighting might cause reflection issues.
Luster and satin finishes are the diplomatic middle ground. They offer much of glossy paper’s color vibrancy while reducing the glare and fingerprint issues. Professional photographers often gravitate toward these finishes because they provide excellent color reproduction without the drawbacks of pure glossy. The slight texture helps diffuse light just enough to minimize reflections.
For something truly eye-catching, metallic paper creates an almost three-dimensional appearance with its pearlescent sheen. Colors become incredibly vibrant, and the metallic base adds depth that makes images seem to glow from within. It’s perfect when you want a print that stops people in their tracks.
Paper weight matters more than you might think. Heavier papers (measured in pounds or grams per square meter) feel more substantial and resist curling better. A 65-pound paper feels noticeably more premium than a 45-pound option and handles the ink application process more reliably.
If you’re working with a laser printer, the paper selection process is quite different. Our guide to the Best Photo Paper for Laser Printers covers those specific requirements. And when longevity matters most, consider Archival Quality Printer Paper to ensure your prints last for generations.
Getting Your Digital Photo Ready for Print
Here’s where many home printing projects go wrong – rushing straight to print without properly preparing the digital file. Your screen and your printer speak different languages, and we need to help them communicate effectively.
Image resolution is absolutely critical, and 300 PPI (Pixels Per Inch) is your magic number. This ensures every detail in your photo translates to crisp, clear print quality. A photo that looks sharp on your phone screen might be a pixelated mess when printed if the resolution is too low. Think of PPI as the building blocks of your print – more blocks mean finer detail.
The color challenge comes from a fundamental difference: your monitor creates colors with light, while your printer uses inks and dyes. This means color correction becomes essential. Before printing, adjust your brightness and contrast to account for this difference. Work in RGB color mode for desktop printers – converting to CMYK can lead to unexpected color shifts that leave you scratching your head.
Cropping and aspect ratio planning prevents those frustrating moments when your printer automatically crops out someone’s head. A 4×6 print has a 2:3 aspect ratio, so crop your photo to match before printing. This gives you complete control over the composition rather than leaving it to the printer’s algorithms.
When it comes to file formats, JPEG works well for most photo printing needs, balancing quality with manageable file sizes. For maximum quality, especially after extensive editing, TIFF format preserves every detail without compression artifacts.
Taking these preparation steps seriously transforms your printing results from “pretty good” to “absolutely stunning.” The few extra minutes spent on proper prep pay dividends in the final print quality.
The Main Event: A Step-by-Step Guide on How to Print on Photo Paper
Now comes the exciting part – changing your carefully prepared digital image into a beautiful physical print! This is where all your preparation pays off, and frankly, it’s where most people either create stunning results or wonder why their photos don’t look quite right. The secret lies in two crucial steps: loading your paper correctly and telling your printer exactly what you’re working with.

How to Load Photo Paper into Your Printer
Getting the paper into your printer might seem straightforward, but there’s definitely a right way and a wrong way to do it. Trust me – I’ve seen too many beautiful photos printed on the wrong side of expensive photo paper! The key is understanding your specific printer’s personality.
Front-load trays are what you’ll find on most modern home and office printers. These trays slide out from the front, and here’s the golden rule: load your photo paper with the glossy or print side facing DOWN. Think of it like placing a slice of bread butter-side down – you want that special coated surface ready to meet the ink.
Rear-load trays are common on older models or printers designed for heavier media. With these, you’ll do the opposite – load the photo paper with the glossy or print side facing UP. It’s like the printer is saying, “Show me what you’ve got!”
Some printers come with dedicated photo trays, which are smaller compartments specifically designed for common photo sizes like 4×6 or 5×7 inches. These are fantastic because they’re purpose-built for photo printing. For most of these, you’ll load the paper glossy side down, but always check your manual first.
Here’s where people often go wrong: the print side absolutely matters. Photo paper has one side specially coated to absorb ink beautifully, while the other side is just regular paper backing. Print on the wrong side, and you’ll get dull, washed-out colors that make you wonder if your printer is broken.
Before loading, take a moment to fan your paper stack. Gently bend and release the stack to separate the sheets – this prevents multiple sheets from trying to go through together and causing those frustrating paper jams that seem to happen at the worst possible moments.
Once your paper is in place, adjust those paper guides so they gently touch the edges of your photo paper. They should be snug enough to keep everything aligned but not so tight that they bend or warp your expensive paper. Think of it as a gentle hug, not a wrestling match.
One final tip: handle your photo paper by the edges only. Those oils from your fingers can affect print quality, and nobody wants fingerprints on their masterpiece. For more comprehensive information about different paper types and what your printer can handle, check out our More info about Best Printer Paper Guide: Types and Sizes.
How to Configure Your Printer Settings for Flawless Photos
This is where the magic really happens in learning how to print on photo paper. Your printer is incredibly smart, but it needs you to tell it exactly what kind of paper you’ve loaded and how you want your image to look. Think of it as giving your printer a detailed recipe for success.
Start by accessing your printer properties through the print dialog box. When you hit “Print” from your photo editing software, look for buttons labeled “Properties,” “Options,” or “Preferences.” This opens up your printer’s control center where all the important decisions get made.
The most critical setting is paper type selection. This isn’t just a suggestion – it’s absolutely essential. Your printer needs to know whether you’re using glossy, matte, or semi-gloss paper because each type requires different amounts of ink and different handling. Select “Glossy Photo Paper” if that’s what you loaded, or “Matte Photo Paper” for matte finishes. Get this wrong, and you might end up with smudged prints or colors that look nothing like what you expected.
For print quality, always choose the highest setting available. Look for options like “Best,” “Max DPI,” or “Photo.” Yes, it uses more ink and takes longer, but the difference in detail and color richness is remarkable. It’s like the difference between watching a movie on a phone versus a big-screen TV.
Color mode is another crucial setting. For color photos, make sure you’re set to RGB (Red, Green, Blue). Your printer will handle the technical conversion internally. For black and white photos, look for “Grayscale” or “Monochrome” settings to avoid those annoying color casts that can make your black and white photos look slightly green or magenta.
If you want your photo to extend all the way to the edges without white borders, enable borderless printing. This feature isn’t available for all paper sizes or all printers, but when it works, it creates that professional, edge-to-edge look.
Double-check that your paper size matches what you’ve actually loaded, and if your printer has multiple trays, make sure you’ve selected the right input source. It’s frustrating to set everything up perfectly only to have your printer pull paper from the wrong tray!
At Automated Business Machines, we help businesses throughout Georgia optimize their printing workflows with customized solutions that take the guesswork out of achieving consistent, professional results. Whether you’re printing client presentations or preserving family memories, the right setup makes all the difference. For specialized printing needs, our guide on More info about Best Laser Printers for Cardstock Printing offers additional insights for different printing scenarios.
Advanced Techniques and Sizing
Once you’ve mastered the basics of how to print on photo paper, it’s time to explore the creative possibilities that lie beyond standard snapshot sizes. Think of this as graduating from photography basics to the exciting world of custom printing projects. Whether you’re dreaming of stunning panoramic landscapes or personalized greeting cards, these advanced techniques will transform your home printer into a versatile creative tool.

Printing Standard and Custom Photo Sizes
While the trusty 4×6 and 5×7 inch prints have served us well for decades, your printer is likely capable of so much more. These standard sizes remain popular for good reason – they fit perfectly in most frames and photo albums, and virtually every printer supports them without fuss.
For those breathtaking wide-angle shots you captured on vacation, panoramic printing opens up a whole new dimension. The most common panoramic size is 4×12 inches, perfect for showcasing sweeping landscapes or group photos. Here’s the key: load your panoramic paper into the main input tray rather than the dedicated photo tray. Then steer to your printer settings (like the HP Smart app) and select the corresponding panoramic paper size before hitting print.
Custom dimensions are where things get really exciting. Maybe you’re creating a unique scrapbook page or designing wall art with specific measurements. Most modern printer drivers allow you to define custom paper sizes by entering exact width and height measurements. Some Toshiba models even let you register up to 40 different custom sizes – talk about flexibility!
The software you choose can make all the difference in your printing experience. Applications like the HP Smart app, Microsoft Photos app, or Mac’s Photos app provide intuitive interfaces that make selecting sizes, adjusting layouts, and managing print jobs feel almost effortless. These tools take the guesswork out of advanced printing projects.
Common Photo Print Sizes:
- 4×6 inches – The classic snapshot size that fits standard frames
- 5×7 inches – Perfect for tabletop displays and smaller albums
- 8×10 inches – The go-to choice for formal portraits and framing
- 8.5×11 inches – Letter size for documents and larger artistic prints
- A4 size – International standard similar to letter size
- 4×12 inches – Panoramic format for wide-angle shots
- 5×5 inches – Square prints that work beautifully for social media favorites
For specialized professional needs, you might even explore More info about Legal Size Photo Paper to handle larger format requirements.
Considerations for Double-Sided Photo Printing
Creating double-sided photo prints feels like open uping a secret feature of your printer. This technique is fantastic for greeting cards, invitations, or unique album pages that tell a story on both sides. However, success requires understanding a few important considerations.
Not all photo paper plays well with double-sided printing. You’ll want to look for paper specifically labeled as “duplex” or “double-sided photo paper.” These special papers are coated on both sides and engineered to prevent ink from bleeding through. Red River Paper’s 86LB Pecos River Gloss Duo, for example, is designed as one of the heaviest, thickest double-sided options available.
Matte finishes tend to work better than glossy for double-sided projects. The less reflective surface reduces smudging risks when printing the second side, and it naturally hides any slight show-through from the first print. HP specifically recommends using 4×6 inch matte photo paper for two-sided printing with their ENVY Inspire printers through the HP Smart app.
Here’s where printer compatibility becomes crucial. Not every printer supports automatic duplex printing for thicker photo media. If your printer lacks this feature, you’ll need to try manual duplexing – printing one side, letting it dry completely, then carefully flipping and re-feeding the paper for the second side. Patience is key here; rushing this process almost always leads to smudged results.
The creative possibilities for double-sided printing are endless. Greeting cards become truly personal when you print a favorite photo on the front and a heartfelt message inside. Wedding invitations can feature engagement photos on one side with ceremony details on the other. Mini photo albums created by folding double-sided prints make wonderful gifts that tell complete stories.
These advanced techniques transform simple photo printing into a creative outlet that’s limited only by your imagination. With practice, you’ll find yourself thinking beyond basic prints and exploring the full potential of your home printing setup.
Post-Print Care and Troubleshooting
You’ve successfully printed your beautiful photos – congratulations! But the journey isn’t quite over. Proper post-print handling and storage are essential to ensuring your prints last, and knowing how to troubleshoot common issues will save you headaches (and wasted paper!).

Handling and Preserving Your Printed Photos
Think of your freshly printed photo as a delicate newborn – it needs time to adjust to the world before it’s ready for handling. Those gorgeous prints you just created deserve the best care to ensure they’ll look stunning for years to come.
The moment your photo emerges from the printer, resist the urge to grab it and admire your handiwork up close. Instead, place the photo face-up on a flat, clean surface and give it at least 15 minutes to completely dry. This crucial process, sometimes called “outgassing,” allows the inks to fully cure and bond with the paper. Touch it too soon, and you’ll likely end up with smudged fingerprints on your masterpiece.
Once your photos are properly dried, always handle them by their edges only. This simple habit prevents unsightly fingerprints and oils from your skin from transferring to the image area. If you’re handling many prints or want extra protection, lint-free cotton gloves are a photographer’s best friend.
Storage conditions make a huge difference in photo longevity. Your prints are happiest in an environment between 5˚C to 30˚C (41˚F to 86˚F), ideally stored flat in their original plastic bag to protect from humidity and dust. HP recommends keeping your printing environment at room temperature between 15˚C to 30˚C (59˚F to 86˚F) with 20% to 80% relative humidity for optimal results.
When stacking multiple prints, place a clean sheet of plain paper between each photo to prevent them from sticking together – there’s nothing more heartbreaking than prints that bond permanently and tear when separated.
For long-term preservation, acid-free photo albums or frames with UV-protective glass are your photos’ armor against time. These protect against dust, moisture, and the slow fade that comes with aging. Direct sunlight is particularly harmful – UV rays break down inks and cause colors to fade faster than you’d expect.
If you’re using pigment-based inks like Epson’s DuraBrite, you’re already ahead of the game with superior fade and water resistance compared to dye-based alternatives. For extra protection, photo sealers like Krylon’s Preserve It can add an additional waterproof and fade-resistant layer to your prints. For specialized printing solutions that ensure longevity, explore our More info about Laser Printer Paper for Maps.
Solving Common Photo Printing Problems
Even with perfect preparation, printing gremlins can still appear. Don’t worry – most issues have straightforward solutions once you know what to look for.
Smudging and smearing are often the result of mismatched settings or impatience. When your printer thinks it’s printing on plain paper but you’ve loaded glossy photo paper, it applies the wrong amount of ink and doesn’t allow proper drying time. Always double-check that your printer settings exactly match your paper type. If you’re still getting smudges, try reducing the print quality slightly – sometimes “Max DPI” on very thin papers oversaturates the surface.
Paper jams and misfeeds usually happen when we get a bit too eager with paper loading. Your printer’s photo tray typically holds 20-25 sheets maximum, so don’t stuff it full. Before loading, fan the paper stack well to separate individual sheets – this simple step prevents multiple sheets from trying to feed through together. Make sure your paper guides are snug enough to hold the paper straight but not so tight they bend or warp it.
Color problems can be particularly frustrating, especially when your monitor shows one thing and your print shows another. If your black and white photos are coming out with strange color tints, look for a “Grayscale” or “Monochrome” setting in your printer driver. This forces the printer to use primarily black ink instead of mixing color inks to create gray tones. For color accuracy issues, ensure your image is in RGB mode rather than CMYK, which can cause unpredictable results on desktop printers.
Banding or horizontal lines across your prints usually signal clogged print nozzles or low ink levels. Most printers have built-in cleaning cycles you can run through their utility software. If lines persist after cleaning, it’s likely time for fresh ink cartridges.
Faded prints often result from using dye-based inks in bright environments or not using archival-quality materials. Pigment-based inks offer much better fade resistance, and displaying prints away from direct sunlight dramatically extends their life. Consider protective sealers for prints that will see frequent handling.
When these common fixes don’t solve your printing puzzles, our team at Automated Business Machines specializes in secure printing and digital workflows for businesses across Georgia. Whether you’re in Columbus GA, Macon GA, or Savannah GA, we’re here to help keep your printing operations running smoothly with customized solutions that improve productivity.
Frequently Asked Questions about Printing on Photo Paper
You’ve learned how to print on photo paper like a pro, but we know questions still pop up. Here are the most common ones we hear from folks mastering their home photo printing setup.
What’s the main difference when printing on glossy vs. matte paper?
Think of glossy paper as the showstopper of the photo paper world. It delivers vibrant colors and razor-sharp details with that signature reflective finish that makes colors practically jump off the page. If you’re printing dynamic landscapes, colorful portraits, or any image where you want maximum visual impact, glossy is your best friend.
Matte paper, on the other hand, is the sophisticated cousin. Its non-reflective surface reduces glare and cleverly hides those pesky fingerprints that seem to appear out of nowhere. The result? Prints with a more subtle, artistic feel that’s perfect for black and white photography or when you want that gallery-worthy look.
Here’s the crucial part: your printer settings must match the paper you’re using. Select “Glossy Photo Paper” for glossy or “Matte Photo Paper” for matte in your printer driver. This tells your printer exactly how much ink to apply and prevents issues like smudging or oversaturation.
Can I use inkjet photo paper in a laser printer?
Absolutely not – and we can’t stress this enough! This is one of those mistakes that can turn expensive really quickly.
Inkjet photo paper has a special coating designed to absorb liquid ink. When you put this paper through a laser printer, the intense heat from the fuser unit can actually melt this coating. The result? Severe damage to your printer’s internal components that could cost hundreds to repair.
It’s like trying to use ice cream in a hot oven – the materials just aren’t compatible. Always stick to paper specifically designed for your printer type. Your printer (and your wallet) will thank you.
Why are my black and white photos printing with a color cast?
This frustrating issue happens more often than you’d think, and it’s actually your printer trying to be helpful – just not in the way you want.
Most printers create black and gray tones by mixing color inks (cyan, magenta, and yellow) rather than using just black ink. While this can create smooth gradations, it often results in that unwanted color tint that makes your crisp black and white photo look slightly blue, green, or pink.
The fix is simple: look for a “Grayscale,” “Black and White,” or “Monochrome” setting in your printer driver before hitting print. This setting tells your printer to primarily use the black ink cartridge, giving you those true neutral tones you’re after. Some printers still use a tiny bit of color ink for the deepest blacks, but the color cast will be dramatically reduced.
Conclusion
Mastering how to print on photo paper is like open uping a door between your digital world and the physical one, changing those precious moments stored on your phone or computer into tangible memories you can hold, frame, and treasure. We’ve journeyed together through the entire process – from understanding the subtle differences between glossy and matte finishes to navigating those sometimes-tricky printer settings that make all the difference.
The path from a digital file to a stunning physical print might seem complex at first, but it’s really about understanding a few key principles. Choosing the right paper type sets the foundation, preparing your image at 300 PPI ensures crisp details, and matching your printer settings to your paper choice prevents those frustrating smudged or faded results we’ve all experienced.
What makes this skill truly rewarding is how it brings your memories to life in a completely new way. There’s something magical about seeing your favorite vacation photo emerge from the printer with vibrant colors and sharp details that your screen simply can’t replicate. Whether you’re creating a photo album for grandparents, printing professional presentations for the office, or crafting personalized greeting cards, these techniques open up endless creative possibilities.
The beauty of home photo printing lies in the control it gives you. No more waiting for lab processing or settling for generic print sizes. With panoramic prints for those breathtaking landscapes, custom dimensions for unique projects, and even double-sided printing for greeting cards, your printer becomes a gateway to professional-quality results right at your desk.
At Automated Business Machines, we understand that quality printing isn’t just about the technology – it’s about the memories, presentations, and creative projects that matter to you. As a locally owned and operated company serving communities from Johns Creek GA to Marietta GA and beyond, we’ve seen how the right printing solutions can transform both personal and professional workflows.
Our advanced multifunction printing solutions and digital signage services are designed with the same attention to detail we’ve discussed throughout this guide. We believe that whether you’re printing family photos or important business documents, the results should be nothing short of exceptional.
Ready to explore even more printing possibilities? Explore our complete guide to printer paper types and sizes to find how different papers can improve your printing projects. And remember, when you’re ready to upgrade your printing capabilities or need expert support, Automated Business Machines is here to help you achieve those glossy goals with customized solutions that make every print count.